Since we moved two years ago, this collection has been stored in a box in the basement. Tucked away, forgotten and lonely. Even before we moved, we had little kids who I actually did not trust around breakables. I mean, who does? But now, they are Pride of Place in our dining room, above the new drinks station.

Disclosure
Published January 8, 2022
Updated March 30, 2022
This page might contain affiliate links. In the event of a sale, I will be awarded a small commission (at no extra cost for you).
Painting the Shelf
If you want to see the blog about how I sanded this shelf down and painted it, check out my blog by clicking the link below. I used a Milk Paint from Rust-Oleum to paint this shelf and also a topcoat from General Finishes to make sure it stays durable and protected.
The most inexpensive part
Last year, I found this shelf at a garage sale for a super-reasonable price. The shelf was a dark dull wood that needed to be refreshed. Totally, this shelf in materials cost me nothing. Nada. We had sandpaper, paint, topcoat and Metallic Gold spray paint. It was a project that was easy to do and took very little time. Once it was all sanded and painted, dried and given topcoat, it was ready to be finished and assembled.
Although now that Tyler and I are in our mid-thirties, shot glasses do not serve much purpose. We have moved from our early twenties with weekend parties to sipping Jameson and buying good beer. I’d say that is adulting at its finest. Even though we do not use these glasses, I still love them for the memories of travel and gifts from friends and family.
In this collection, there are glasses from our home state of Wisconsin, Idaho, Iowa, Illinois, Indiana, Florida, Texas, California, Alaska, Minnesota, Washington and more. I even have one from Turkey! It may be silly to some, but this is a way to collect a souvenir for a minimal cost, that is small to pack, and super cute. I feel that the most expensive one was under $15 and the cheapest has been under $2.
How I gave it a back panel
Tyler wanted me to go to a store and buy a sheet of mirror and have it cut to size, then he would use his router to make it fit into the back. But we were looking at $20 or more for a mirror. And I am cheap when it comes to projects. I like to DIY with on-hand objects as much as possible.
After a thorough search, finding some wood and existing pictures and mirrors, I came across a thin sheet of plexiglass used for a poster I recently sold on eBay. Then I went to get a piece of cardboard, marker, yard stick and a utility knife.
In the basement, there was a severely dirty sheet of plexiglass. The plexiglass was then cleaned with an antibacterial cleaner before prepped and painted.

Then, using a yard stick, placed it on the back of the shelf to see how big it needed to be. A yard stick helped to hold the plexiglass sheet down and provided a straight line for marking where to cut.

First, I cut the long cut straight down. Secondly, I cut the bottom horizontal line to keep the sheet intact. It made more sense to do it this way and not have a flap of plexiglass dangling.

After the two cuts, the plexiglass was then ready to be prepped for spray paint! And no cuts! Sometimes I can be SUPER clumsy and require bandages and ice. Not so much for lack of skill, but for lack of patience.

Prepping the plexiglass
This next step was so important, as the plexiglass is very smooth, and I wanted to spray paint it. To help the paint stick to the plexiglass, it needed a roughing-up with a piece of sandpaper. I used a piece of 220 and a sanding block and gave it a good scrub while having it rest on a drop cloth.

Now for my favorite part! Spray paint! Holding the can 10-inches above and at an angle, I sprayed across in rows from the top to the bottom of the plexiglass. This sheet of plexiglass needed four coats of paint to get the most even coverage.
Also, using a drop cloth while spray painting is a great way to protect any surface. For the back panel of this shelf, I went for a Metallic Gold from Rust-Oleum. We had this can, half full, from a previous project!
*Pro-Tip* Double up the drop cloth for smaller projects!

This is how the sheet of plexiglass looked after just one coat of spray paint. The paint was then left to dry before another coat was applied.

Pride of Place and a lot of Bling
Here is the sheet with three coats of Metallic Gold spray paint. As it was still slightly blotchy without an even coverage, a fourth was applied.

Once the fourth and final coat was sprayed on, with proper dry time between coats. The paint was uniformed thorough with no splotches, streaks or empty spots.

Dried and ready to be Pride of Place
Once it was fully dried, talking under two hours total from the start of measuring to completely dry, it was finally time to assemble the gold plexiglass onto the back of the shelf.

Assembly time!
Tyler has a small arsenal of screws in our garage, and I found these little guys with washers that would be absolutely perfect at holding the sheet of plexiglass onto the back of the shelf.

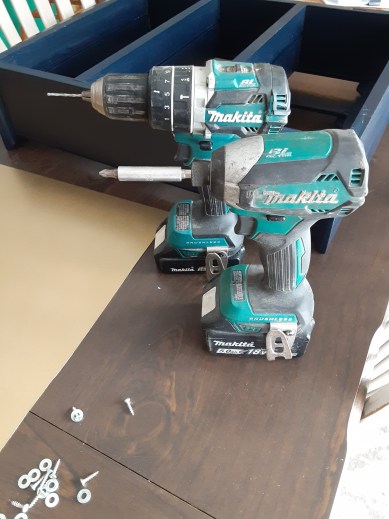
I also commandeered his drill and impact. One will help to drill pilot holes for the screws to go into. The second will screw the screws into the shelf.
One must always have two drills while doing any project. Just make sure you put them back, replacing any and all bits where you found them. At least, I always try to as my husband is usually doing projects and has his tools just-so.
Tyler has a Makita Drills set. They are lithium ion batteries and the set comes with two interchangeable batteries.
Placing the sheet of painted plexiglass, paint side up onto the back of the shelf, I got to measuring and figuring out where to place each pilot hole. I figured ten on the outside and one on each shelf in the middle would be plenty, as it will be hanging flush against the wall. Line up the sheet onto the back, where you will place it, and mark holes on the shelf where you want the pilot holes to go. I used a Sharpie and it worked great.


Pilot Holes
Using the Mikita Drill with a bit smaller than your screw, drill pilot holes less than the length of the screw. This was something that my husband Tyler taught me to do a few years ago. You always drill pilot holes when you want to use screws in wood. The main reason is it helps to not split the wood once the screw goes in.


Slowly, I drilled the screws into each hole with a washer, laying it on top of the sheet of plexiglass. One corner did get a little tight and broke off a corner. It was not an issue as the piece was under the washer and not needing to be re-drilled.
I used a Mikita Impact for the screws. This baby is great and helpful for so many projects! When drilling screws into wood with washers to hold plexiglass, the most important thing to remember is to go slow as to not bread the plexiglass.


Tyler hung it up in Pride of Place
Finally, I marked the back of the sheet where I wanted the shelf screws to go that will hold the middle of the plexiglass so it will not flap. To do this, I stood up the shelf and used the sun to create a shadow with the shelf.
Last of all, it needed to be hung up in Pride of Place! When Tyler got home, he was more than willing to spend ten minutes measuring, drilling holes, placing screw anchors, screws, and finally hanging this beaut. I was so happy with its placement, half-way between the corner and the closet door trim. The drinks cabinet below was then centered under the shelf.

Loading this with my shot glasses was such a memory overload. These glasses have not been out of this green box for many years, and I was so happy to have them on display!

This shelf is one project that I am so proud to have finished. As I am doing more and more DIY, I am learning more about products, skills and processes that help me to learn skills. I already love painting but learning to sand and paint so it looks professional (or slightly rookie) has been really fun. And now I know I do NOT need any more shot glasses from Alaska. Or Florida.
This little collection shows travels since I was a teenager and gives loving memories with our family and gifts from friends and family. My glasses are now hanging Pride of Place in their new home.
~Monica

Copyright: All content and photos on Monica's Scratch Kitchen are copyright protected. Please do not use them without written permission. Thank you.
Leave a Reply